Monday, December 13, 2010

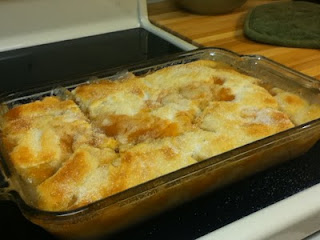
Wash Day Peach Cobbler

One of the family's favorites. Very easy.

This is just a regular 13x9 for a single recipe.  When I double it,
 I use my Pampered Chef  Rectangular Baker stoneware.
I got this from a cookbook called "Madison County Cookbook; Winterset, Iowa".  This cookbook was given to me by a good friend (Hi Diane!!) nearly...15 years ago... sheesh!  Anyway, I love this old, falling-apart cookbook and this is my favorite recipe in it.

1 (16 oz.) can peach fruit or your choice  (I use my home-canned peaches)
1 C. flour
1 C. sugar
1 C. milk
2 tsp. baking powder
Dash of salt
1 stick margarine (I use butter)


Preheat the oven to 400 degrees.  (350 if making a double batch)
In a medium saucepan over medium heat, cook fruit until boiling.  Set aside.  In a medium mixing bowl combine flour, sugar, milk, baking powder, and salt.  In a 2 quart casserole (If doubling, use a deep 13x9).  Melt margarine (butter) in the microwave then pour into the baking dish.  Pour batter over butter (do not stir).  Add hot fruit (do not stir).  Sprinkle a little more sugar on the top just before baking.  Bake at 400  for 20-30 minutes.  (If doubled bake at 350 for 40-45 minutes.)
Makes 4-6 servings (8-12)

Serve this with some vanilla ice cream or even just some whipped cream.  Trust me, it won't last long!

Tuesday, December 7, 2010

The Mad Hatter

Since about March of this year, I have been consumed with crocheting.  It has come to me so much easier than knitting, which I failed at miserably.  My favorite things to crochet are hats.  Here are a few that I have produced. :)


This has to be my new favorite hat to make for babies and toddlers.  I've made several already.  They take a couple of hours (including flower) and are so simple.  
 The pattern is found here: McKinley's hat
Just scroll all the way down and you'll find two sizes to choose from: Newborn and Toddler.
Using white and lime green Caron Simply Soft yarn


Here is my very own model, Miss Ava, looking extremely sweet in a green version topped with a daisy.


 Caron Simply Soft yarn in lavender.


I've made two of these purple "toddler" versions as well.  This one was given as a birthday gift to a friend's daughter, the other for a niece.
I'd put a link to the flower pattern... if I could remember whose pattern I used.  I think I just went to Youtube and searched for "crochet flower" and followed a tutorial.


Olivia's Tulip hat
Caron Simply Soft: watermelon pink and lime green


The Tulip hat was a fun project.  I made it for my littlest niece, Olivia.  She looks so adorable in it... that is, if she were to keep it on.  This hat can easily be adjusted to create any number of fun versions. Use red yarn instead of pink and you have a strawberry.  Use orange and you have a pumpkin.


Caron Simply Soft Grey
This one I made for my niece, Aloura, for
her 17th birthday.


One of my favorite hats to make is the slouchy puff hat.  I don't even know how many I've made... perhaps 5 or 6?  This hat gets high marks with the teens and preteens.  More than one of my nieces is getting this for Christmas!  SHhhhh....


Red Plymouth Encore DK
Acrylic/Wool
The Phannie is a pattern that I have come to really enjoy making.  
It's a bit more sophisticated than the slouchy hat. In fact the first one I made took me several hours... okay a few days.  I spent 4 hours at a crafting day at church just crocheting and then ripping it out, crocheting and ripping it out.  By the end of the day, I was only one row ahead of where I started.  It was pretty frustrating, but I learned a lot from my mistakes.  Now I can whip one up in an afternoon.   My daughter Emily pleaded to have the first one I made, and quite frankly, she totally owns it.  It looks so cute on her, how could I refuse?  Alas, I did make another for a niece... or two.  
Yes, I have many, many nieces :)  

Nine to be exact.

Which reminds me.. I have a few Christmas presents I need to finish up. 

Friday, November 12, 2010

Raised Glazed

So this morning, my children inquired as to whether or not I was inclined to make doughnuts any time in the near future.  I took this as an opportunity to bribe... er, uh... positively reinforce desirable behavior.  I agreed to make deliciously baked delicacies as long as they refrained from poor judgement when in each other's presence.  Okay so basically, I promised them food if they wouldn't fight.  Yes, it has come to this.  Now you know what I'm willing to pay for peace and tranquility.. or at least the illusion of it.

 My recipe (and by "my" I mean Betty Crocker's) isn't a bread machine recipe per se, but as long as I put all the wet ingredients plus the salt in first, followed by the flour and sugar, keeping the yeast last and separated from the wetness, it works.  This recipe is a bit larger than most I make so I had to be sure to take it out as soon as the hour and a half was up.  Even then, the dough was beginning to ooze its way out of the mixing bucket.
Homer Price
yes, I stole this image from Amazon...
SO if you want to buy this book, buy it there. :)

It brought to memory a favorite childhood book.  "Homer Price" by Robert McCloskey... who coincidentally also wrote "Blueberries for Sal"... but that's another day.  The collection of short stories about a young boy named Homer was written in 1943.  Its wonderfully simple, vintage illustrations just scream "school library".  One of the stories tells about Homer and his encounter with Uncle Ulysses's doughnut machine.  I don't remember everything, but I do recall the machine goes haywire, cranking out doughnuts in a very "I Love Lucy" sort of scene...great book.

So the ingredients are put in, the machine turned on, dough comes out the top...

I rolled the dough about a 1/2 inch thick and cut out the doughnuts.  One of the best things about making doughnuts is that it's inevitable that you will make doughnut holes as well.. BONUS!  Doughnuts (and holes) got placed on parchment paper and covered to rise for about 30 minutes.

This was about when I realized I didn't have enough oil in which to fry the doughnuts.  I'm sure this never happens to Rachel Ray... SHE has a staff.  Heading down to the garage, I grabbed my car keys and slipped on my shoes.  That's when I met up with my dear husband, doing his dear husband thing.  He's halfway through waxing both cars.  He noticed the purse... Lucky for me the KwikStar is just down a block, and even though I had to pay astronomical prices, I got two bottles of oil, a little exercise, and a diet Pepsi for my trouble.


I heated the oil to
350 and plopped those bad boys right in.  Oh, the sound of food frying in 3 inches of pure vegetable oil is wonderful thing.  The first time I made doughnuts I used a spatula to turn them over, but now I like to use two wooden skewers.  Not nearly as messy.  After about a minute of frying, I flipped them over one by one.  Another minute in the oil bath, then they got hoisted onto a paper towel laid over a cooling rack.   This process repeated several times.


 Some were buried in powdered sugar, some were twisted in glaze and still others were iced with chocolate.  The holes were dropped into a paper sack filled with powdered sugar and given a nice shake.  They were handed out to the natives before dinner to keep them from getting too restless.


The kids held up their end of the bargain... as far as I know, and I took great joy in watching them feast on their reward.

 Good thing I had that
Diet Pepsi earlier.  It cancels out the doughnut... right? ;)

P.S. Deaconess Sarah, if you're reading this, Pastor will be bringing some in to the office in the morning.  Make sure he shares.
Tuesday, November 9, 2010

A Beast of a Dinner

So tonight during dinner, my husband complimented me by saying, "Great dinner, hun."   To which my teenager added, "Yeah, it was a beast!"

I figured that warranted a blog entry.

Tonight's dinner was pretty easy.  BBQ pulled pork sandwhiches and coleslaw.
It starts around noon. I put a 3lb. boneless pork shoulder into the crockpot.  Using a seasoning packet for crockpot BBQ Pork, I followed the directions for the sauce and poured it over the pork.  Cover and cook on high for at least 4 hours.  Later when it was done, I used two forks to pull apart the meat.

We like to use divided plates for messy meals.  Mine is pink :)
Next my attention went to the rolls.  Using "My favorite dough recipe" (from a previous blog entry) I added the ingredients to the bread machine and set it for "dough".  Later, I measured and shaped the dough into sandwhich rolls, letting them rise for an hour or so.

The coleslaw is an imitation of KFC's coleslaw, and my husband's favorite.  I used bagged slaw and just made the sauce for it.  Here's the recipe:

1/3 cup sugar
1/2 tsp. salt
1/8 tsp. pepper
1/4  cup milk                          
1/4 cup buttermilk*
2 1/2 TBS lemon juice
1 1/2 TBS white vinegar
1/2 cup mayonnaise (or miracle whip)

*I don't usually have buttermilk on hand so I increase the milk to 1/2 cup and just pour the lemon juice into the milk and let it thicken for a few minutes.  Then I add it to the rest of the ingredients.

Whisk all the ingredients together and pour over slaw. Toss and then refrigerate 2+ hours.

Now, I have never lived in the South, but I do watch The Food Network... hmmm strange sentence.  What I mean is I have watched OTHERS from the South make BBQ pulled pork, and I have noticed a common occurrence;  the putting of the coleslaw ON the pork IN the sandwich.  YUM!  I'm the only one in my family who enjoys this combination of creamy-cold and spicy-sweet, however, I highly recommend it!

Open a can of baked beans or a jar of applesauce and you have a very tasty and easy meal.  :)


yummy

Tuesday, October 26, 2010

And... it's a wrap!

Okay, FINALLY the LAST page about my kitchen.  I must say, this project took longer than I planned, but the results were far better than I expected... so I won't complain!

The last couple of things I did were to make curtains for one window and fix up a shelf.

First the shelf.  I re-purposed an old wood shelf by priming it with a deep rust color spray paint, then lightly coating it with the same blackened bronze colored paint I used on the cabinet hinges. It turned out great.  Dan mounted it on my backsplash and tada!

my fabric for curtains
Secondly, I made curtains for the window.  I found pretty cheap fabric at a quilt shop just over the river.  I wanted something fresh and simple.  I went with a fairly small orange floral pattern on an off white background, and complimented it with a contrasting sage and tan plaid fabric.  I bought a yard of each.


  I spent a lot of time looking at different types of kitchen curtains and settled on a simple tie-up version.   Using the existing hardware, I just needed to hem the orange fabric, fold it in half and sew it together making a huge rectangle.  I left about an inch open at the top in order to slide the curtain rod through.


"Two lines over"
REAL technical sewing terms here.
 Next I made two ties out of the plaid fabric:  I cut the strips 5 inches wide and the entire width of the fabric (44"). With right sides together, I sewed up one of the short ends, and then up the long sides of the tie.  I'm not sure what width my seam was... I just lined it up with the second line on my sewing machine.  I'm thinking it was just a smidge over 1/4 inch. Next, I pressed the seam.   I left the second end open in order to turn the fabric.


To finish, I just folded in the un-sewn edge of the tie and stitched across it twice.  I did the same thing to the other end, just to make them match.


I draped the ties over the curtain rod and gathered the orange fabric up at the bottom.  I tied a knot with the ties and arranged the curtains.

Not bad!  It could use some steaming, but I'm pretty happy with how they turned out. :)

So FINALLY, the kitchen is finished.


...to This.
From This....

    
And from there...
...to here.


Before: The table and four chairs fit, but it made
accessing the built in hutch awkward.


We removed two chairs and now have more space to move.


Okay, so how cute is my cat?
Yes, I'm aware she's on the table, but that is HER window.


Now... about the bathroom...


Monday, October 25, 2010

Kitchen continued..

Pumpkins!
I've chosen to accent the kitchen with
shots of orange :)

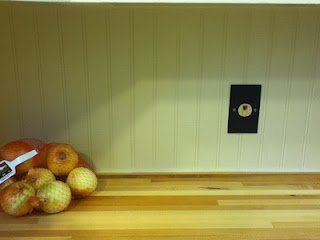
We continued the beadboard from the breakfast nook into the kitchen as backsplash.  I love the simplicity of the beadboard up against the butcherblock counters.  I'm very pleased with how it came out.  Dan, painstakingly cut each peace and put it up for me, while I then used my cake decorator skills and sealed it all with silicone caulking.  We still want to add a small piece of trim where the beadboard meets the counter, but I have to say, it looks pretty good as is!   I gave the beadboard three coats of paint.  
I washed and painted the phone jack cover to match
the other plates I got at Home Depot.


The old florescent light.


The lighting was a bit of a headache.  I didn't like the florescent lights that were previously over the sink.  I envisioned two pendant lights hanging there, but this meant drilling two additional holes in order to space the lights correctly, not to mention another electrical box deally thing.... too much work.  I searched, searched, and searched some more on the internet for a solution.  Finally, I found the answer.  "Island lighting".  While this fixture is supposed to be positioned over an island, I decided it would work great over my sink.  It actually came with extension rods which would position the lamp at the right height from the ceiling... great, except I was using it over my sink, and didn't want to bang my head into the fixture. Consequently, we left ALL 
the extensions out and just mounted the fixture right to the ceiling above the sink.  SUCCESS!  

It is amazing what an updated light and a little paint can do!
  I so love this kitchen now.  It is amazing what updating a kitchen will do for your desire to cook!  Even the kids have commented on how much more I have been baking lately.  They love it.  So do I :)   My next post will show a few finishing touches, and then THE reveal!


Wednesday, October 20, 2010

Roomba review

For Christmas last year, I was given a Roomba iRobot 550 vacuum cleaner.  Mary Ann, as I have come to call her, is my new BFF.  She was given the name Mary Ann in reference to the maid whom the white rabbit screams for in the pages of "The Adventures of Alice in Wonderland".  MARY ANN!! OH, MARY ANN... you get the idea.

Mary Ann
I'm well aware that she's a luxury.   But if you think about it, so was the automatic dishwasher at one point in our country's history.  Now, you rarely see a home without one.  So this too, Mary Ann has become to me; indispensable.

With the push of a button she gingerly backs up out of her nesting spot to survey the work area.  She cheerfully dings her little starting song and sets off in her first direction.  Criss-crossing through the room, Mary Ann's only hesitation is when she comes in contact with the laser-beaming road block I've set up in advance.  Mary Ann is not only efficient... she's smart too.  Once she has touched the "no-no" light she makes note to cross it after she's duly done her duty in the currently occupied room.  After 25 minutes in one room, she is given programmed permission to cross the laser into the next room.  Around chairs, under sofas, teasing the cat with her spinning brush, Mary Ann is focused.  She's also mesmerizing.  I've found myself just standing watching to see if she's really going to come back and get that one spot she missed.... wait for it, wait for it... YES! SHE GOT IT.  She transitions from hardwood, to linoleum and back to carpet with ease.. which is good, because I have all three surfaces!   This is starting to sound like a commercial for the iRobot!
The No-No light

Mary Ann can be programmed to run at any time, at any schedule, but so far I have opted to simply push her buttons when I want a reaction... ironically, this is something I'm particularly good at.

But lately, Mary Ann has been sluggish.  She's singing her finished song after only 9 minutes of work.  She's not responding to her brush cleanings and can't even muster up enough energy to find her way back to her nesting spot.  I'm thinking she'll be hitting me up for a raise soon... or maybe she just needs a new battery.  Research I've read says she'll need a new one within a year.  Perhaps her new battery can be seen as a vacation, just the thing she needs to get back to work.  I suppose I can understand that. :)

Monday, October 18, 2010

The Pen is Mightier Than the Sword


 I love convenience and functionality.  I love good ideas.  WD-40 in a pen... now THAT's a good idea.

Ever go to the grocery store and you get THE cart.  The one that squeeks, squeals and shrieks as you push it through the store?  Yeah, me too.  One day, while shopping, I noticed the pen that would change all that for me.  WD-40 in a convenient push pen.  This thing is awesome.   A little push on the bolt of the wheel and presto...no more squeaky carts.   Of course it's great for other stuff like rusty sliding door screens and electric hair clippers.  


Here is a link to many more ideas:


300 uses for WD-40 no mess pen.


Thursday, October 7, 2010

My Dirty Little Secret


Buy Now Save Later!!!

Now is the time to buy dirt... cheap! 

I have a fairly large yard to keep up with and I'm constantly in need of new dirt.  But dirt ain't cheap, so I wait for a sale.  Last year around this time, I stumbled on $2.00 bags (1.5 cu.ft.)  of Organic Miracle Grow, which usually sells for $10.48/bag.  I think I bought about 10 bags and stored them on a pallet in my garage. I used it all btw. I wanted to get a similar deal this year, but waited a little too long.  So yesterday, I snatched up ten $3.00 bags (1.5 cu.ft.) of Miracle Grow gardeners mix.  There were only 15 bags left!  They are sitting in the back of my Jeep waiting to be hoisted to their winter spot on the empty pallet in my garage.  I can now rest all winter long knowing that come spring, I will be ready!  

I also make sure I have a couple bags of perilite (the little white balls that come in potting mixes) and sphagnum peat moss to mix in with the soil to give it an extra boost. :)  

Wednesday, October 6, 2010

A Chip Off the Ol' Butcherblock and even the Kitchen Sink

Before: left side
By far, the most difficult part of our little reno project was installing the counters and sink.  Which, by the way, is why we enlisted the expert help of a good friend and board of trustee member.  Thanks Jay!!

Before: right side
Why we chose butcherblock:  How ridiculous would it be for me to go grocery shopping at Walmart wearing Versace and diamonds? (Yeah, cause I own either...:::smirk:::)  That's how I felt about putting granite in our little country kitchen.  It just doesn't seem appropriate.  I wanted something that said, "Hello, I'm a friendly little kitchen, and I will work really hard to make sure your dinners are yummy for your family."  Yes, my house speaks to me. :)  Oh, that, and the fact that granite's way out of our budget.  Still, I have to say, I LOVE the butcherblock.
Maple Butcherblock


Where we got the butcherblock:  Well, I did a lot...and I mean a LOT of research on the internet about butcherblock.  How to install, where to buy, how to care for ... etc.  It came down to two choices.  IKEA makes a good looking butcherblock counter that seems to work really well for most people.  It's slightly thinner (1 1/4" vs. 1 1/2" )  and the nearest store is in Chicago.  Or for slightly more money (really, just pennies considering the gas to Chicago), we could go to Lumber Liquidators in Davenport and get the 1 1/2" thick maple.  Done deal.  We figured we would need two 8' slabs to do the entire kitchen.  I told you it was small.


Old counters removed
How "we" installed the butcherblock:  Yeah.  All I can say, is that every parsonage should be so blessed as to have a trustee like Jay.  The man is meticulous at his work.  And although he's more familiar with flooring, he's just as fantastic with counters.  There were no shortcuts taken in installing our counters.  He sanded, sanded and sanded some more... he tongue and grooved for a perfect fit, he basically treated our humble little kitchen like it was to service kings and queens.  He sacrificially spent ALL day away from his family in order to put my kitchen together.  We so appreciate it!
No mitering here.  The sink piece was tongue and grooved
with the edge pieces creating a very snug fit. 


Waterlox... on half.  
How we care for the butcherblock:  After the installation, I sanded the entire surface of the butcherblock with a fine grade sandpaper, wiped the dust away and applied the first coat of sealant.  Consistently, my research concluded with Waterlox being voted as THEE best sealant for butcherblock counters.  Over and over and over again, it was praised as the 
most popular choice.  How could I argue with that?  The only problem... I couldn't find the stuff anywhere!  I ended up just ordering it over the internet from the Waterlox site.  I liberally applied three coats, waiting 24 hours between each coat for drying.  With each pass, the counters became richer in color. I was getting pretty excited.


As for the sink, I threw caution... and budget... into the wind.  I tried, seriously, I did try to want a stainless steel sink.  Truly.  But it just wasn't happening.  My first wish was an apron farmhouse sink, but the dishwasher door made it impossible to have a sink that stuck out any farther than the cabinets, so that was a no-go.  After a few days of mourning the death of my dream, I tried to suck it up and envision a common stainless steel sink... Just wasn't happening.  On a trip to Home Depot I found it.  An espresso-colored, granite/resin composite sink.  Such a thing of beauty.  Rejuvenated hope. (dramatic much?)

Granite composite sink and new faucet
Our personal superhero...  His face is shielded in order
to protect his secret identity.


Jay continued his ministry to our parsonage kitchen by installing the sink AND the disposal.  I even have a little button on the sink that activates the disposal.  So cool.  


 So we are getting closer to finishing.  Still to come:  Backsplash, lighting, and finishing touches!!  I'd better get working on those curtains!